
Computer Setup | Learn Japanese now! Enrollment for online lessons is free. |
Setting Up Your Computer for Japanese (Windows XP)
These instructions explain how to set up your Windows XP computer so that you can see
and type Japanese text.
Instructions for other systems:
Step 1
Open your control panel. (Click the Start button in the lower left corner of your screen,
and choose Control Panel from the menu.) 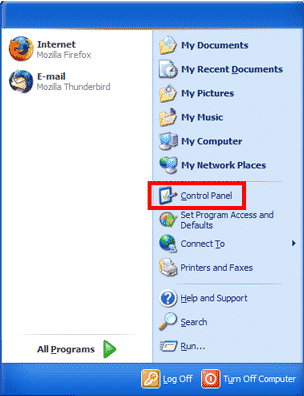
Step 2
From the control panel window, double-click Regional and Language Options.
This will open another window.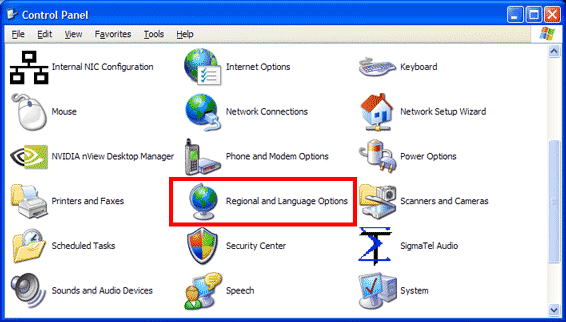
Step 3
Click the Languages tab. 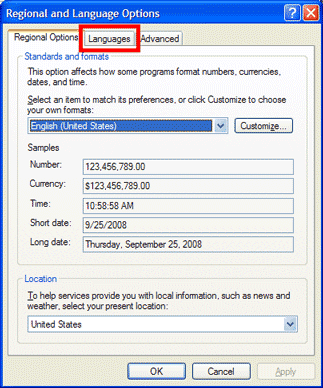
Step 4
On the Languages tab, there are three steps:
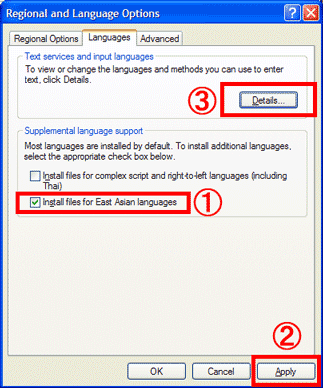
- First, click Install files for East Asian languages. (If this item is already checked, skip to step 3.) You may need your Windows XP CD to complete this step.
- Click Apply.
- Click Details.... This will open another window.
Step 5
On the new window (titled "Text Services and Input Languages"), click Add....
Yet another window will open.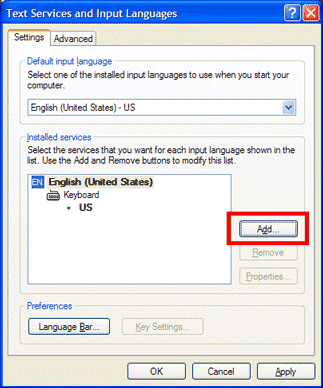
Step 6
Now on the "Add Input Language" window, choose Japanese from the Input Language list.
Then, make sure Microsoft IME Standard 2002 ver. 8.1 is selected in the
Keyboard layout/IME list. Finally, click OK.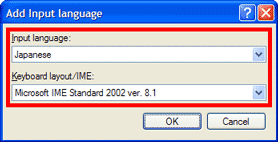
Step 7
Back to the Text Services and Input Languages window, do these two steps:
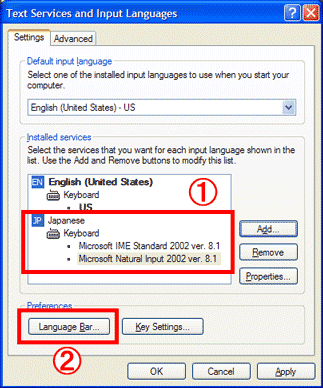
- Make sure the Japanese keyboard information appears as shown below. Note that, even though you selected the Microsoft IME Standard keyboard, the Microsoft Natural Input keyboard may also be listed. That's OK.
- Click Language Bar....
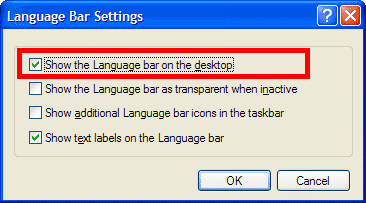
Step 8
The Language Bar is how you switch text entry (typing) between Japanese and other languages.
You can have the language bar always appear on your desktop (recommended),
or keep the language bar nested in the task bar at the bottom of your screen. The recommended
settings are shown here. When finished, click OK.
Step 9
Click OK to close the Text Services and Input Languages window.
Click OK again to close the Regional and Language Options window.
You're all done! You should now be able to type Japanese text in most applications
(including the Nihongo-Pro classroom). To switch to Japanese text entry, follow these steps:
- Open an application where you can type in text, such as Word.
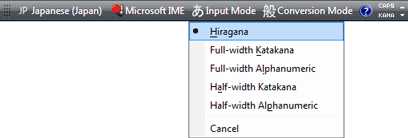
- From the Language Bar, choose Japanese. Then, from the Input Mode menu on the
language bar, choose Hiragana.
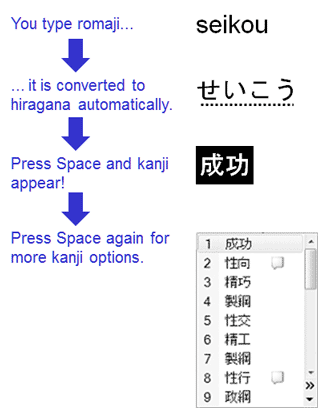
- Type romaji. As you type, your romaji will be converted to hiragana automatically.
The hiragana characters will be underlined with a dashed line. That is your indication
that these characters can be converted to Kanji (see below).
Hit the spacebar, and you'll see the system's recommended Kanji conversion (or the conversion might be plain hiragana—it depends on what you type).Hit the spacebar again, and you'll see all the possible Kanji conversions. Use the up and down cursor keys to choose the one that fits what you're typing, and hit Enter. Your text will be updated automatically.

Copyright © 2010-2015 Horizon Web Services LLC. All rights reserved.