
Computer Setup | Learn Japanese now! Enrollment for online lessons is free. |
Setting Up Your Computer for Japanese (Windows 10)
These instructions explain how to set up your Windows 10 computer so that you can see
and type Japanese text.
Instructions for other systems:
Step 1
Click Settings in the Start Menu.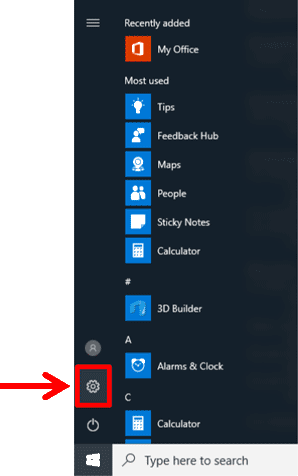
Step 2
In the Settings window, click Time & language.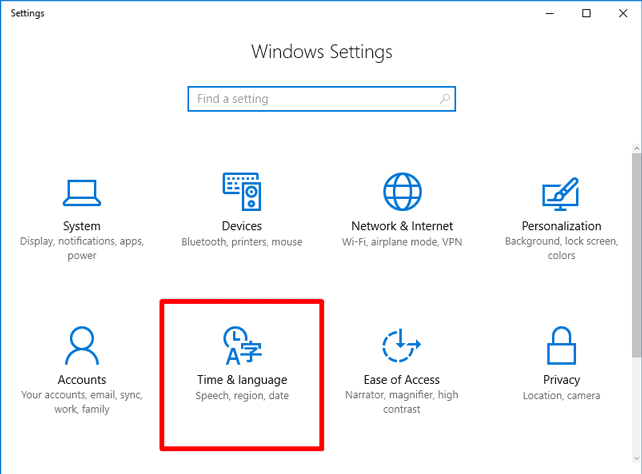
Step 3
Click Region & language, and then click Add a language.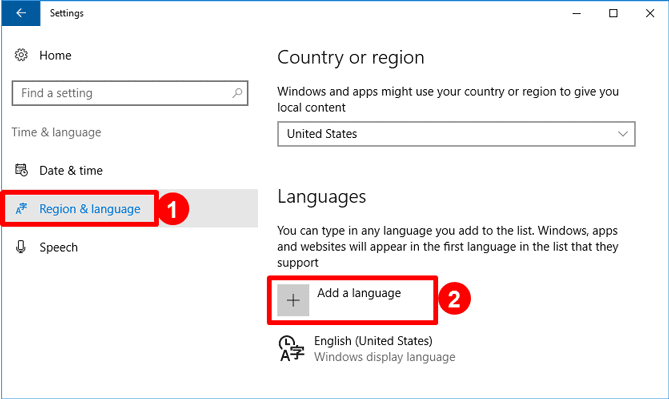
Step 4
Scroll down, and click Japanese (日本語).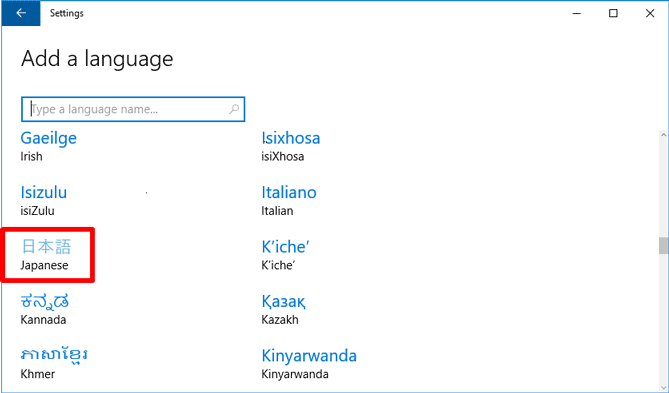
Step 5
Wait a few seconds, and take a look at the Languages section:
Japanese (日本語) will say "Language pack available". Click 日本語, and click Options.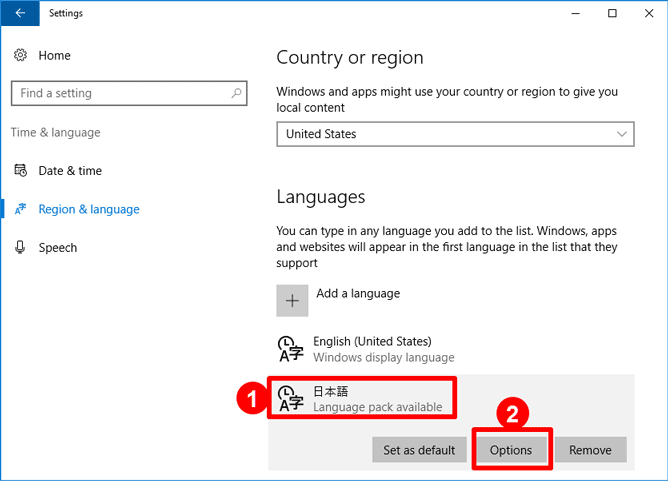
Step 6
Click Download to download the Japanese language pack.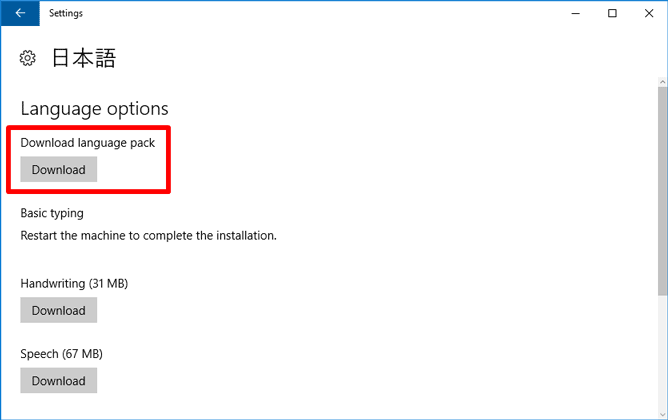 The language pack will take several minutes to download. Wait for it to finish,
and restart your computer if prompted.
The language pack will take several minutes to download. Wait for it to finish,
and restart your computer if prompted.
Step 7
In the status bar (lower right corner of the your screen), a new item "ENG" (English) will appear.
Click this item, to display the language menu.
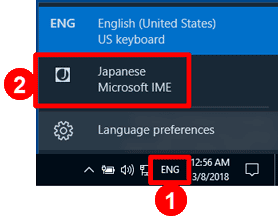 Any time you need to type in Japanese, click Japanese from this menu.
Step 8
When Japanese text entry is active, two icons will appear in your status bar, as
shown below.
 The J icon means Japanese text entry is active.
The あ (hiragana "a") icon means you are typing in hiragana mode. In this mode, you type romaji (alphabetic) characters, and the computer converts these characters to hiragana automatically.
Click あ, and the icon will change to A. In this mode (called alphanumeric mode), the computer does not convert what you type to hiragana.
To access more options, right-click the あ or A icon.
- Two katakana modes convert what you type into katakana. One mode is full-width katakana (全角 zenkaku); the other is half-width katakana (半角 hankaku). In almost all cases, full-width is the best choice.
- Likewise, you can enter full-width or half-width alphanumeric characters. Generally, when writing horizontally, half-width alphanumerics are preferred. When writing Japanese vertically, full-width alphanumerics are common.
Step 9
You're all done!
You can now type Japanese text in most applications. To switch to Japanese text entry, follow these steps:
- Open an application where you can type in text, such as Word.
- Open the language menu as described above, and choose Japanese.
- Make sure あ (hiragana mode) is displayed in the status bar. (If A appears, click it to switch to hiragana mode, or right-click and choose Hiragana.)
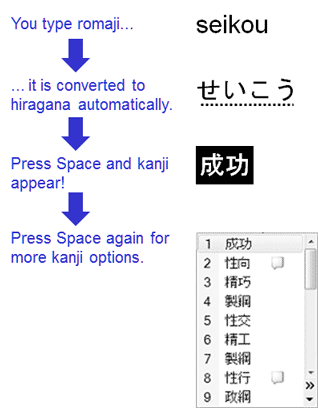
- Type romaji (such as "nihongo"). As you type, your romaji will be converted to hiragana automatically.
The hiragana characters will be underlined with a dashed line. That is your indication
that these characters can be converted to Kanji (see below).
Hit the spacebar, and you'll see the system's recommended Kanji conversion (or the conversion might be plain hiragana—it depends on what you type).Hit the spacebar again, and you'll see all the possible Kanji conversions. Use the up and down cursor keys to choose the one that fits what you're typing, and hit Enter. Your text will be updated automatically.

Copyright © 2010-2015 Horizon Web Services LLC. All rights reserved.